Monday, April 28, 2008

Warp 3 Sir?

I know we were all a bit disappointed that our robot didn't work for the first event, but now that we have had a bit of a break it is time to get going again.

I thought I'd get the ball rolling by revealing what I've been working on over the last week. Speed controllers are essential if you want to have any level of control over the robot. Especially if you are using more powerful motors, you need to be able to operate them over a wider range of speeds than "OFF" and "WARP 8".

Obviously, the poor-man's solution to this problem would be to simply put a variable resistor in series with the motor which could be used to limit the amount of voltage that was dissipated across the motor. However, this has the negative aspect of continually draining maximum power from the battery, giving it a shorter operational life than a red-shirt.

Speed controllers work by creating a pulse-width-modulated signal. The actual process of generating a PWM wave with an appropriate duty-cycle is a little bit complicated, but at it's basic level PWM is just a square wave with a fixed period, but the on and off times vary depending on how much current you want to supply to the load. To further abuse the star-trek analogy, a 20% on - 80% off wave would merely stun, whereas setting your phaser to 90% on - 10% off would most certainly kill. This means that no power is wasted when the motors are operating at a low speed, but they are still capable of working at their full capacity when the tap is fully opened.

Anyway, I've put together a PWM speed controller that uses two transistors and two MOSFETS, which should be able to deliver up to 20A at a voltage range of 7-40V. Unlike pre-assembled speed controllers, which I've been unable to find for less than $100, this one cost a measly $20. Stay tuned for pictures.

A few considerations:
  • One speed controller can control a single motor, so if we use a two motor drive system (independent left and right wheel control) I'll have to put together another one. Not that it's a problem - it will just cost another $20.
  • Although the circuit is supposedly rated to 20A, operating at full capacity for an extended period of time is likely to burn out the MOSFETS. Phil, keep this in mind when you are buying the motors - less might be more when it comes to the power that they require.
  • I would like to find a way to guarantee that both of the wheels turn at the same speed when we give them the same input signal (ie, full forwards on both will not list lazily to the left). It would be nice to have some way of dynamically adjusting the gain on each of the output channels so that the person driving doesn't have to be continually compensating. Any ideas?
I hope that everyone else is going well with their tasks. We'll see each other on Thursday, but if anyone wants to meet before hand, let us know and I can show off my circuit =)

Live long and prosper.

Monday, April 14, 2008

Batteries and other stuff

Hey, as the first deadline approaches, I'd thought I'd give this blog a go (since I've actually remembered to look at the bookmark now heh).

Firstly, regarding power, we have to use dry cell batteries as Sarah pointed out in an email a whole while ago. I've already discussed with most of you guys my suggestion to go for the sub-C cell type battery to power our robot as these are readily available and fairly good value for money. Plus I've got a pack and the gear to charge them (so we save a bit of money there).

There are a couple of places off the net to get them really quickly and reasonably priced.
http://www.doublel.com.au/index_files/Page440.htm
http://www.harrisrc.com.au/
http://www.feralbatteries.com.au/


These sub-C batteries have a reasonable amount of punch and current (since afterall, they are used for RC cars). We can get batteries that have a capacity of holding 4000mAh, or 3600mAh which is almost double the amount of charge that you can normally find on drill batteries.

I'm thinking of sourcing a couple of used battery packs (6 cells, 7.2volts) for now and seeing how we go. I think we might need to go in the direction of one pack for movement, and one pack for weapons (I'm thinking that two motors will draw alot of current). Also we can pull the packs apart to make new packs with different amounts of cells and change the shape of the pack itself. Right now we just have to get our robot moving and I already have a pack for that.

If anyone else has suggestions for batteries, please post up!

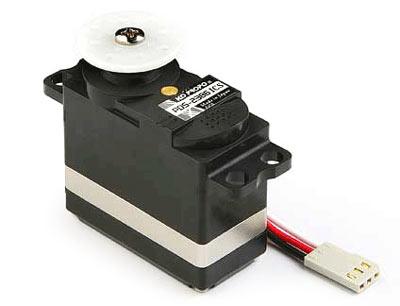
Another problem that we need to figure out (for later down the track) is how exactly we are going to control our robot. We can easily buy a 4 channel remote (2 for driving and steering, another 2 for weapons) but we need to figure out how we are going tackle the problem of figuring out an interface between our motor/weapon system to the receiver unit. At the moment, I'm clueless to how these receivers actually work. We could just probably find some servos to stick on them for the weapons at the very least.

Monday, April 7, 2008

Meeting time

Some of us are (or will be) having trouble getting to the 5:00 meetings on Thursday. Can everyone reply to this post with the times that are best for them. Those of us who can still make it to the regular meetings should go, but it would be good if we could all meet up at least once a week.

In other news, the first minor robot competition will be in about 2 weeks. By then, we need to have:

  • A chassis
  • A power source (batteries)
  • Two drive motors (and applicable gearboxes)
  • Tank treads (or wheels)
The other thing is that it looks like it might be a while before the uni will allow us to use their workshop to start building, so can everyone please post what tools/facilities they have access to? In the short term, we might have to do quite a bit of work at home.

Also, I hope that you are all going well selling chocolates and shares!

Peas out -

Friday, April 4, 2008

Making Tracks

Here are various methods for making scale sized tank treads http://www.rctankcombat.com/articles/track-systems/

My Feet Hurt

Wednesday, April 2, 2008

Stalins Hammer

Time to throw my ideas into the ring. Please don’t see this as me trying to step on anyone’s toes or ideas.

In my viewing experience, some of the most successful Bots didn’t have or use any fancy weapons to beat the others, they used brute strength to man-handle the other contestants into those fiery pits or ram them up against the wall.

The design I’m thinking of is very similar, using a battering ram and high torque motors to bash the opponent into submission!

Taking into account the Australian Rules of Battlebots, specifically the one not guaranteeing a perfectly flat arena, my idea is too use tank treads to power the machine, in a dual configuration ala The Mammoth Tank of Command & Conquer fame to lower the resistance and power draw from the batteries. It also takes from Alex’s idea of having the drive wheels above and below the chassis Alex raised good point about having to change the steering 50% of the time, this can be solved using this a bit pricey but well worth it?

And finally the chassis/design, build the weapon into the chassis so the battering rams are tied directly in and there is no central compression point when something gets rammed.

Brought too you by Caffeine,

Tuesday, April 1, 2008

Image of Initial Robot Design


Hey guys,

I know this is kinda late, but it's still technically Tuesday night, and I've been busier than I thought I would be so I didn't get to get your critique and suggestions. I probably could have done a more refined job if I had more time, and have added a few more things just to make it look meaner (I was thinking a pirate flag). But notice I did end up putting racing stripes on to increase its aerodynamic something-or-other (I'll ask Dave to put in a big word in here later since he's the aero dude in the team).

This blog was brought to you by Philip Gun

More than meets the eye

Ok, I'm done being eaten by my assignment, so I'm ready to share my brainwave for how to build the chassis. I only got about 2 hours of sleep last night, and I think I've got bird flu so right now the only thing keeping me functioning is copious amounts of amphetamines - I make no guarantees about the coherency of this post.

Right, down to business. In it's current state of design, our robot has no fixed form. We have no assurances about the availability or effectiveness of parts, only the vaguest idea of what the rules are, and we all have different ideas about what would make a good robot. As I have mentioned in previous posts, the best way to deal with this is to incorporate this flux into the design itself.

The chassis is the hardest part to design in this capacity, because it needs to accommodate all of the other parts within it. Since each module is unknown and subject to change, the chassis needs to:

  • Expand or contract in volume to encase parts of any size.
  • Provide mounting points at any location to support parts.
  • Be strong enough to support heavy parts or contain reaction forces.
  • Not be unnecessarily heavy or bulky.
I suggest that we make the chassis like a roll cage out of metal tubes and Y-joints. If we use bolts to hold the assembly together then we can re-configure it's size and shape to whatever we need. We can drill holes in the tubes without compromising much of their strength to join them together, and of course we can always cut longer tubes shorter if we need to.

  • Like lego or meccano, we can reconfigure parts of the chassis without having to buy/design an entirely new one.
  • We can easily extend mounting points by adding Y or X -joints to the scaffold.
  • Strength can be easily increased in a number of ways:
  1. Cross-beams can be added to distribute the load from places
  2. Rigidity can be increased by reinforcing corners and joints
  3. We can upgrade all or part of the chassis - from hollow aluminium to solid aluminium to iron to steel
  • Weight can easily be reduced in places it isn't needed.
Remember that the chassis is not armour. It's primary purpose is to provide mounting points for all the other modules. Once we have got all the pieces working together, we will have several upgrade options available to us: some can be used to strengthen parts of the structure and lighten others. Most importantly, we can continually re-use the pieces, so it won't cost us a fortune!

If anyone has comments or suggestions, please let me know. I will try to get my hands on some suitable material by this Thursday, so that we can use the time in the lab productively. I hope you will all come along to help out!